
Refuel is a new feature of ArkansasOutside.com. Simple food ideas for the outdoors. The last thing you really want to do when enjoying a backpacking trip, overnight canoe or bike trip, or even when car camping is to spend all of your time trying to make some sort of gourmet meal (unless, of course, that’s your thing). Like our first installment, “Refuel – Grits with Poached Eggs”, the recipes listed here aren’t for everyone. We are not nutritionists, we are not catering to any particular diet plan. If you have a recipe you’d like us to post, we would be glad to take a look at it. Remember, keep it simple. Send us your ideas at arkansasoutside.joe@gmail.com.
Refuel – Grits with Poached Eggs
One of our favorite breakfast meals incorporates those southern staples, grits and eggs. Personally, I like an over-easy egg on my grits. The yolk really adds something to the grits. Generally, when making grits and eggs, there are at least two dirty pots when you’re done. This is how you make a tasty breakfast without getting any pots dirty.
This is what you need:
- Instant Grits – There are several companies that make these. Some come pre-flavored with butter or cheese. You could use some higher-end grits that will take some time to boil and will get a pot dirty plus, it will take constant supervision for at least 10 minutes.
- Eggs – The nice thing about eggs is that they come in their own packaging for free. Of course, you get what you pay for, so we recommend carrying them in a small egg-safe device.
- Water – This is a central ingredient, mainly because it’s the one thing we hope you remembered to bring on the camping trip.
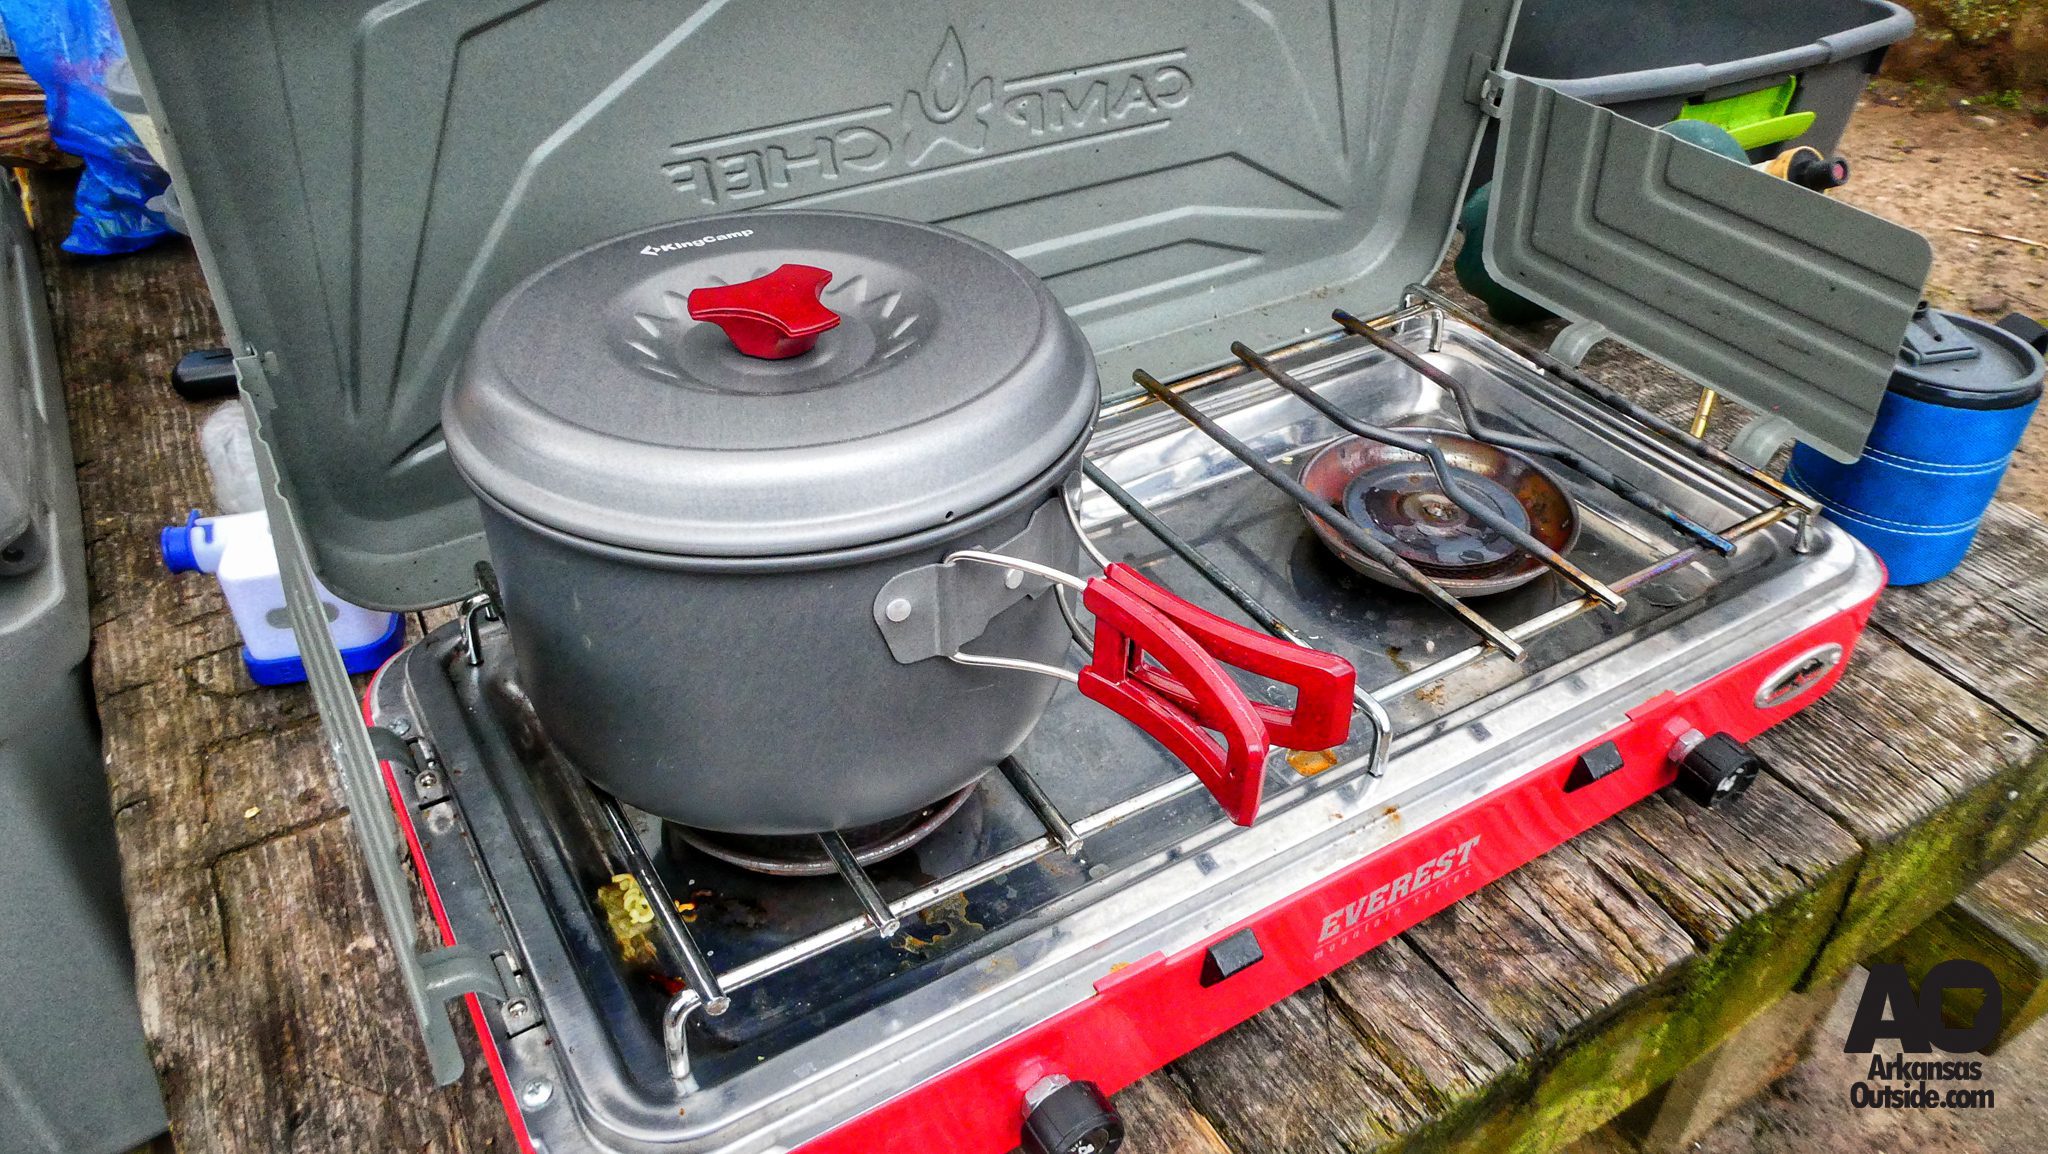
- Stove – This can be anything from a small backpacking stove to something that we are really happy with when car camping, Our Camp Chef Everest Stove. This thing can get water boiling quickly, leaving you more time for eating and getting you on the trail faster. If you don’t have a stove (or forgot the fuel) you can boil water over your campfire.
- Pot – Something large enough to prepare the quantity of food needed for the number of people in your group. When car camping, too big is preferred to too small. We picked up a nice KingCamp Pot Set that nests well and gives us exactly the size we need when we need it.
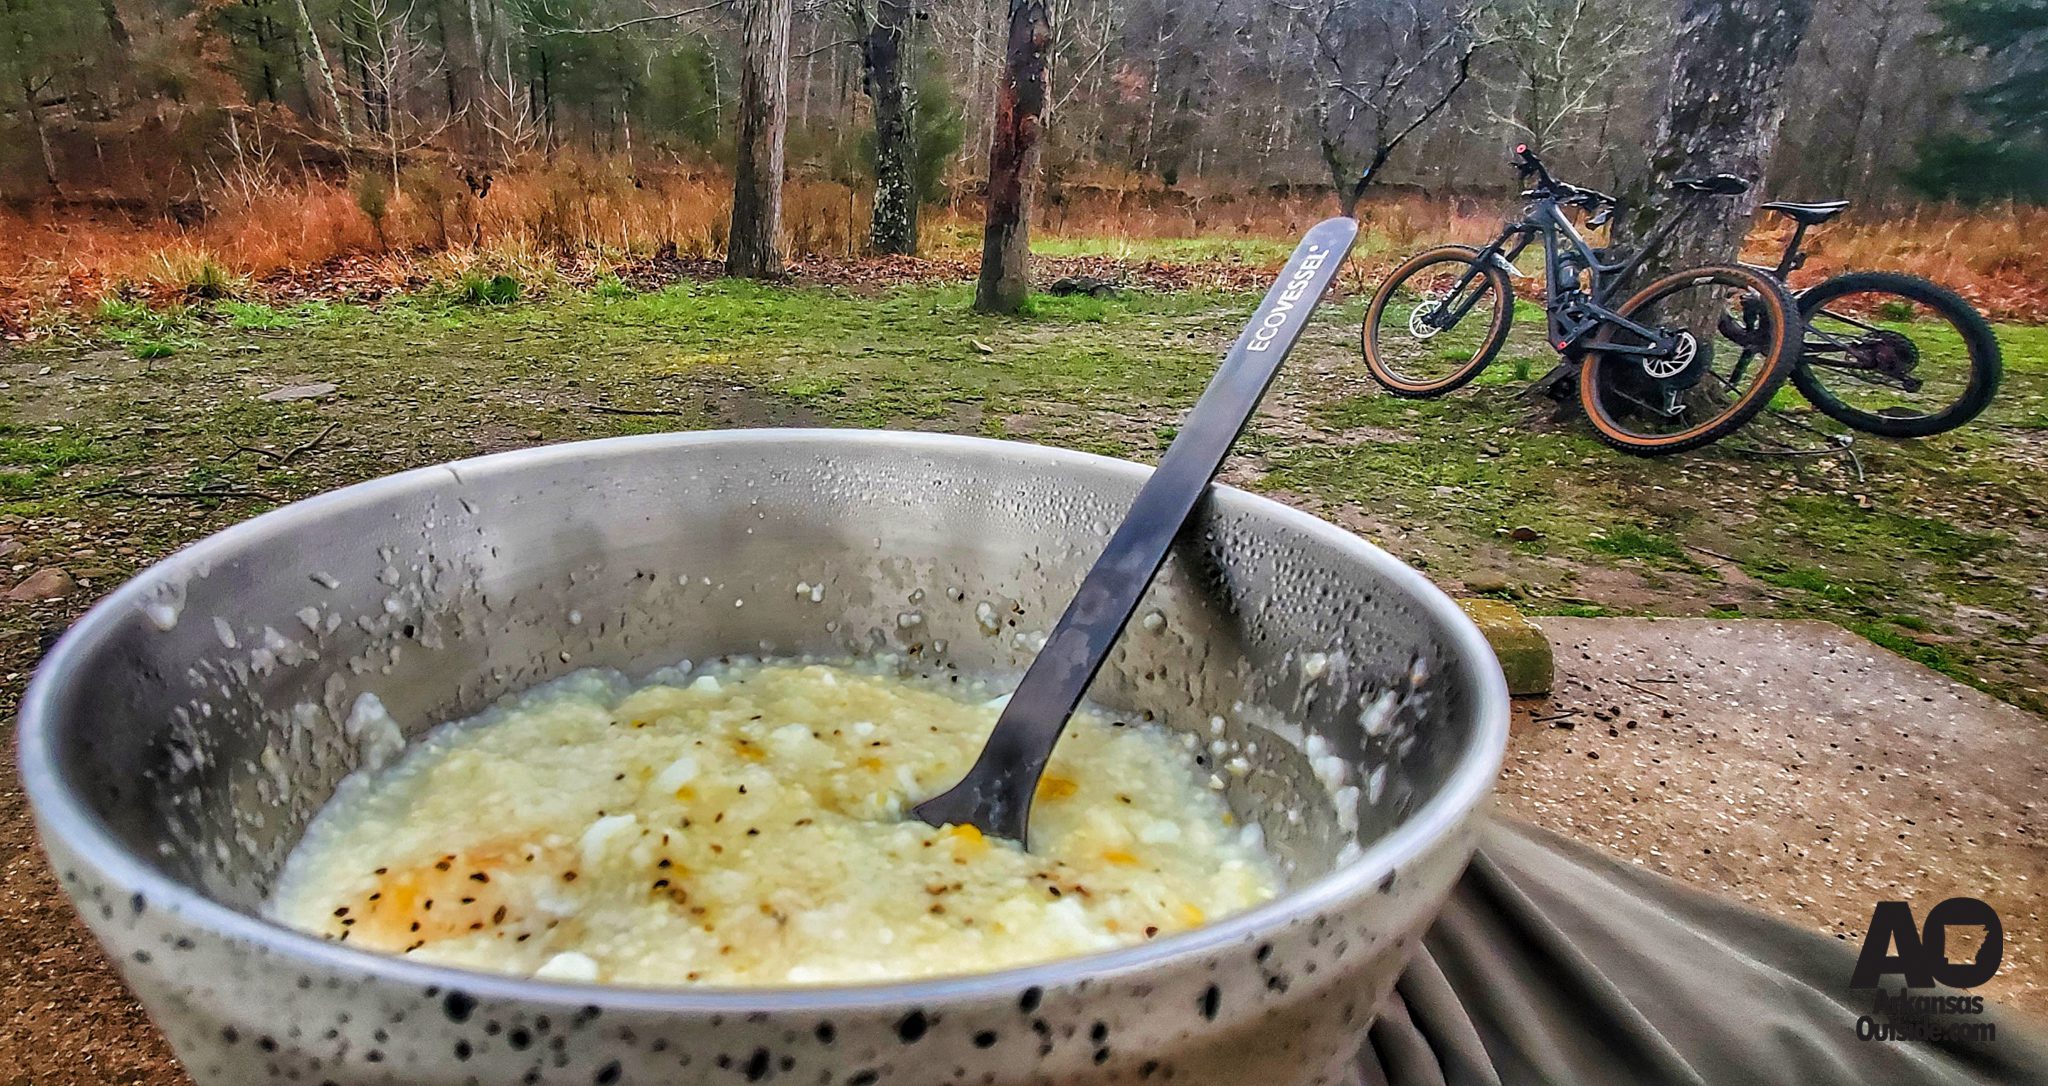
- Bowl – Everyone will need one. If you’re alone you can just mike your grits in the pot but if there are others you are sharing your camp with, eating out of the communal cook pot is kind of a dirtbag move. We like our Fifty/Fifty Stainless Steel Insulated Bowls so we don’t burn our hands while sitting in a camp chair eating.
- Spoon – We found that a spoon works best for eating this delicacy while also trying to keep grits and egg yolk out of your beard. (A hard-learned lesson) We each have our own set of Ecovessel Utensils that are always in the truck. Carry these utensils with you as you take walks around the campground, you never know when someone will offer a taste of their campsite specialty. A spork will also work well.
- A Plastic Bag – This will be used for poaching your egg(s). There are other devices on the market but this seemed to work fine. I prefer silicone bags to plastic, and there are silicone cups made especially for poaching eggs if you’re really into it.
- Tongs – Always good to have when camping for flipping hot dogs on the grill or moving coals around in the grill or campfire.
Step One:
Boil some water. Pretty simple. Make sure you’re boiling enough to make the amount of instant grits you want. (usually about 1/2 cup of water per packet). DO NOT add the grits to the water, just bring it to a boil.
Step Two:
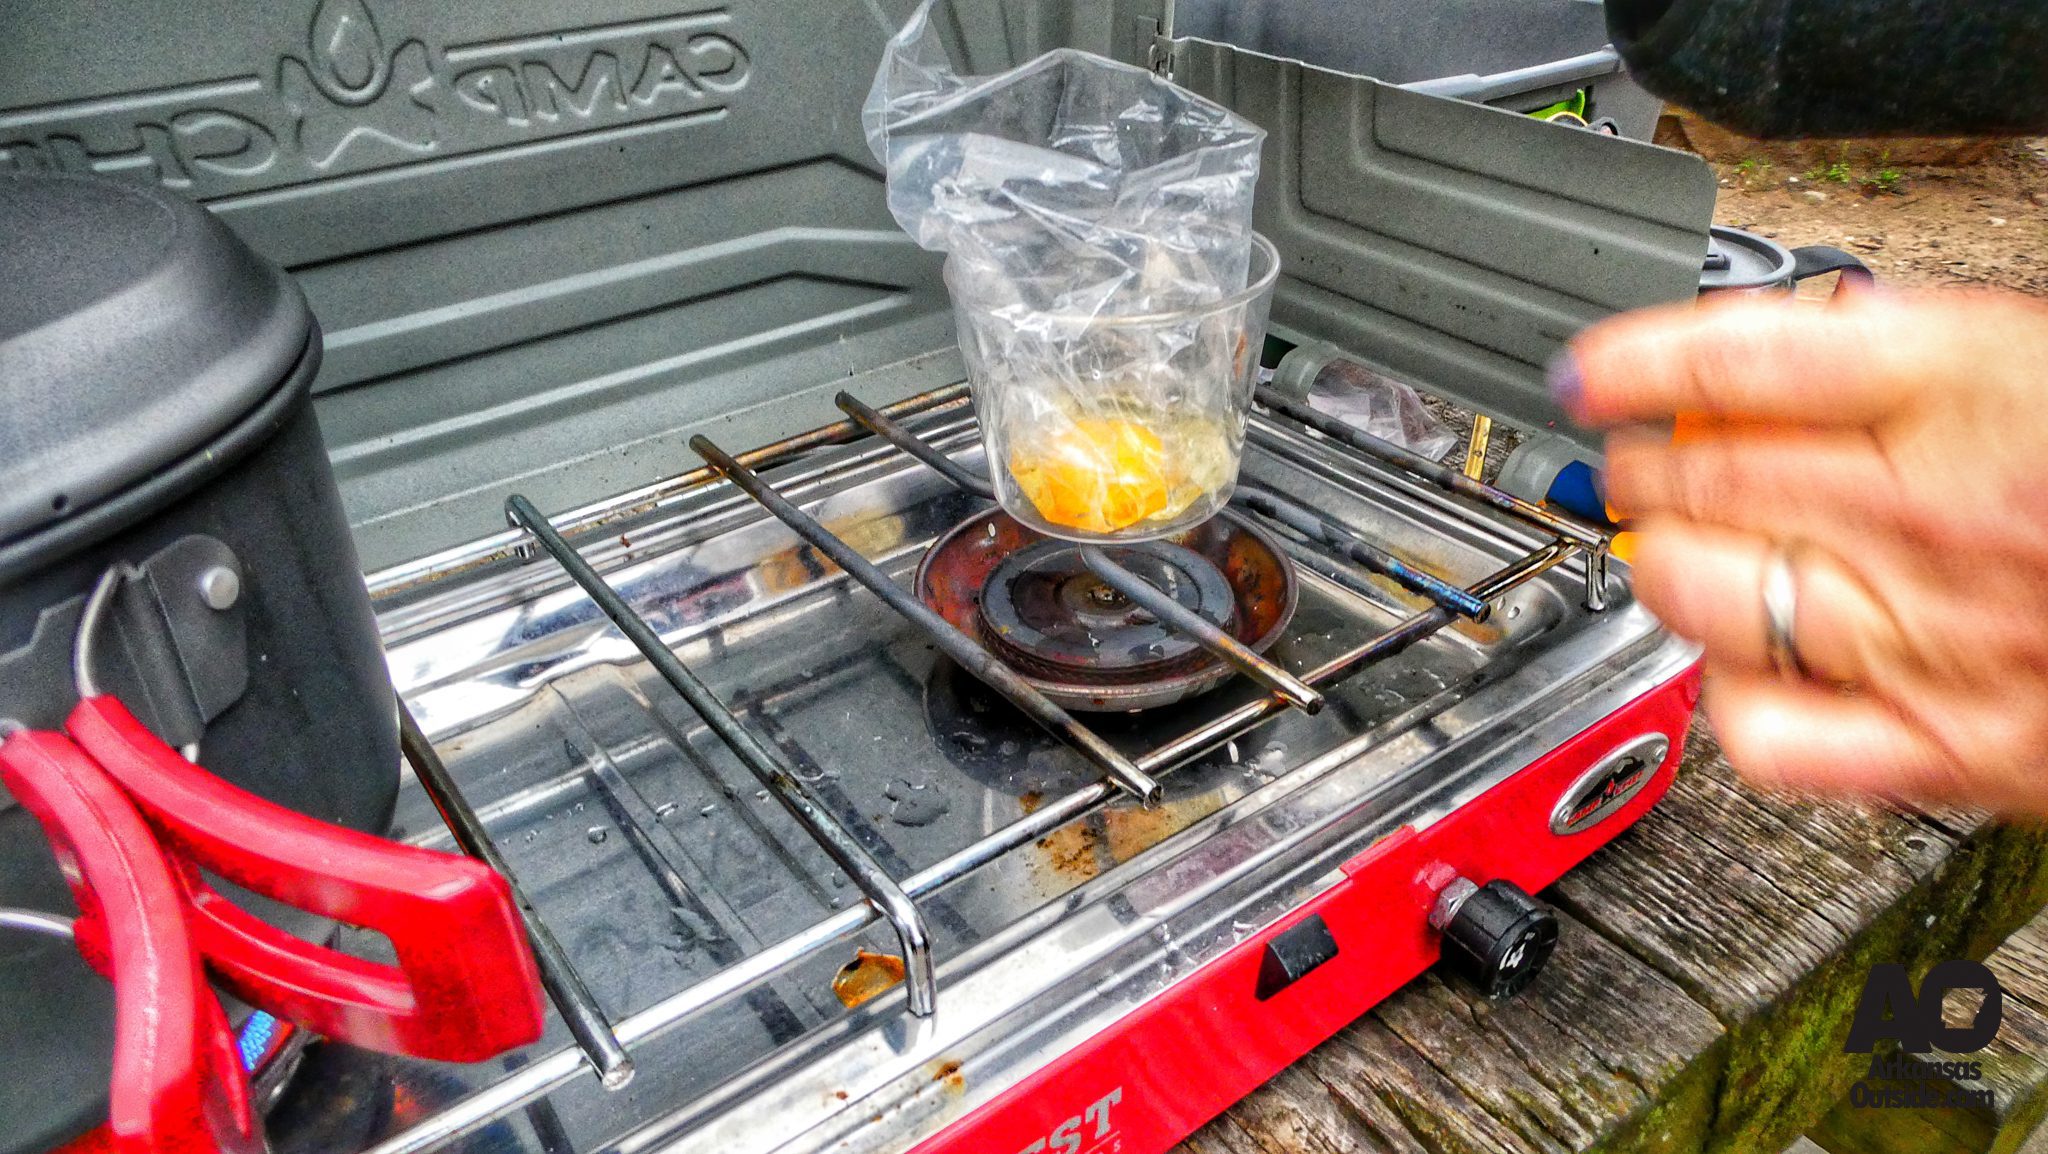
Break an egg or two into your plastic bag. You can use a cup to hold the bag while you are breaking the egg(s) into the bag.
Step Three:
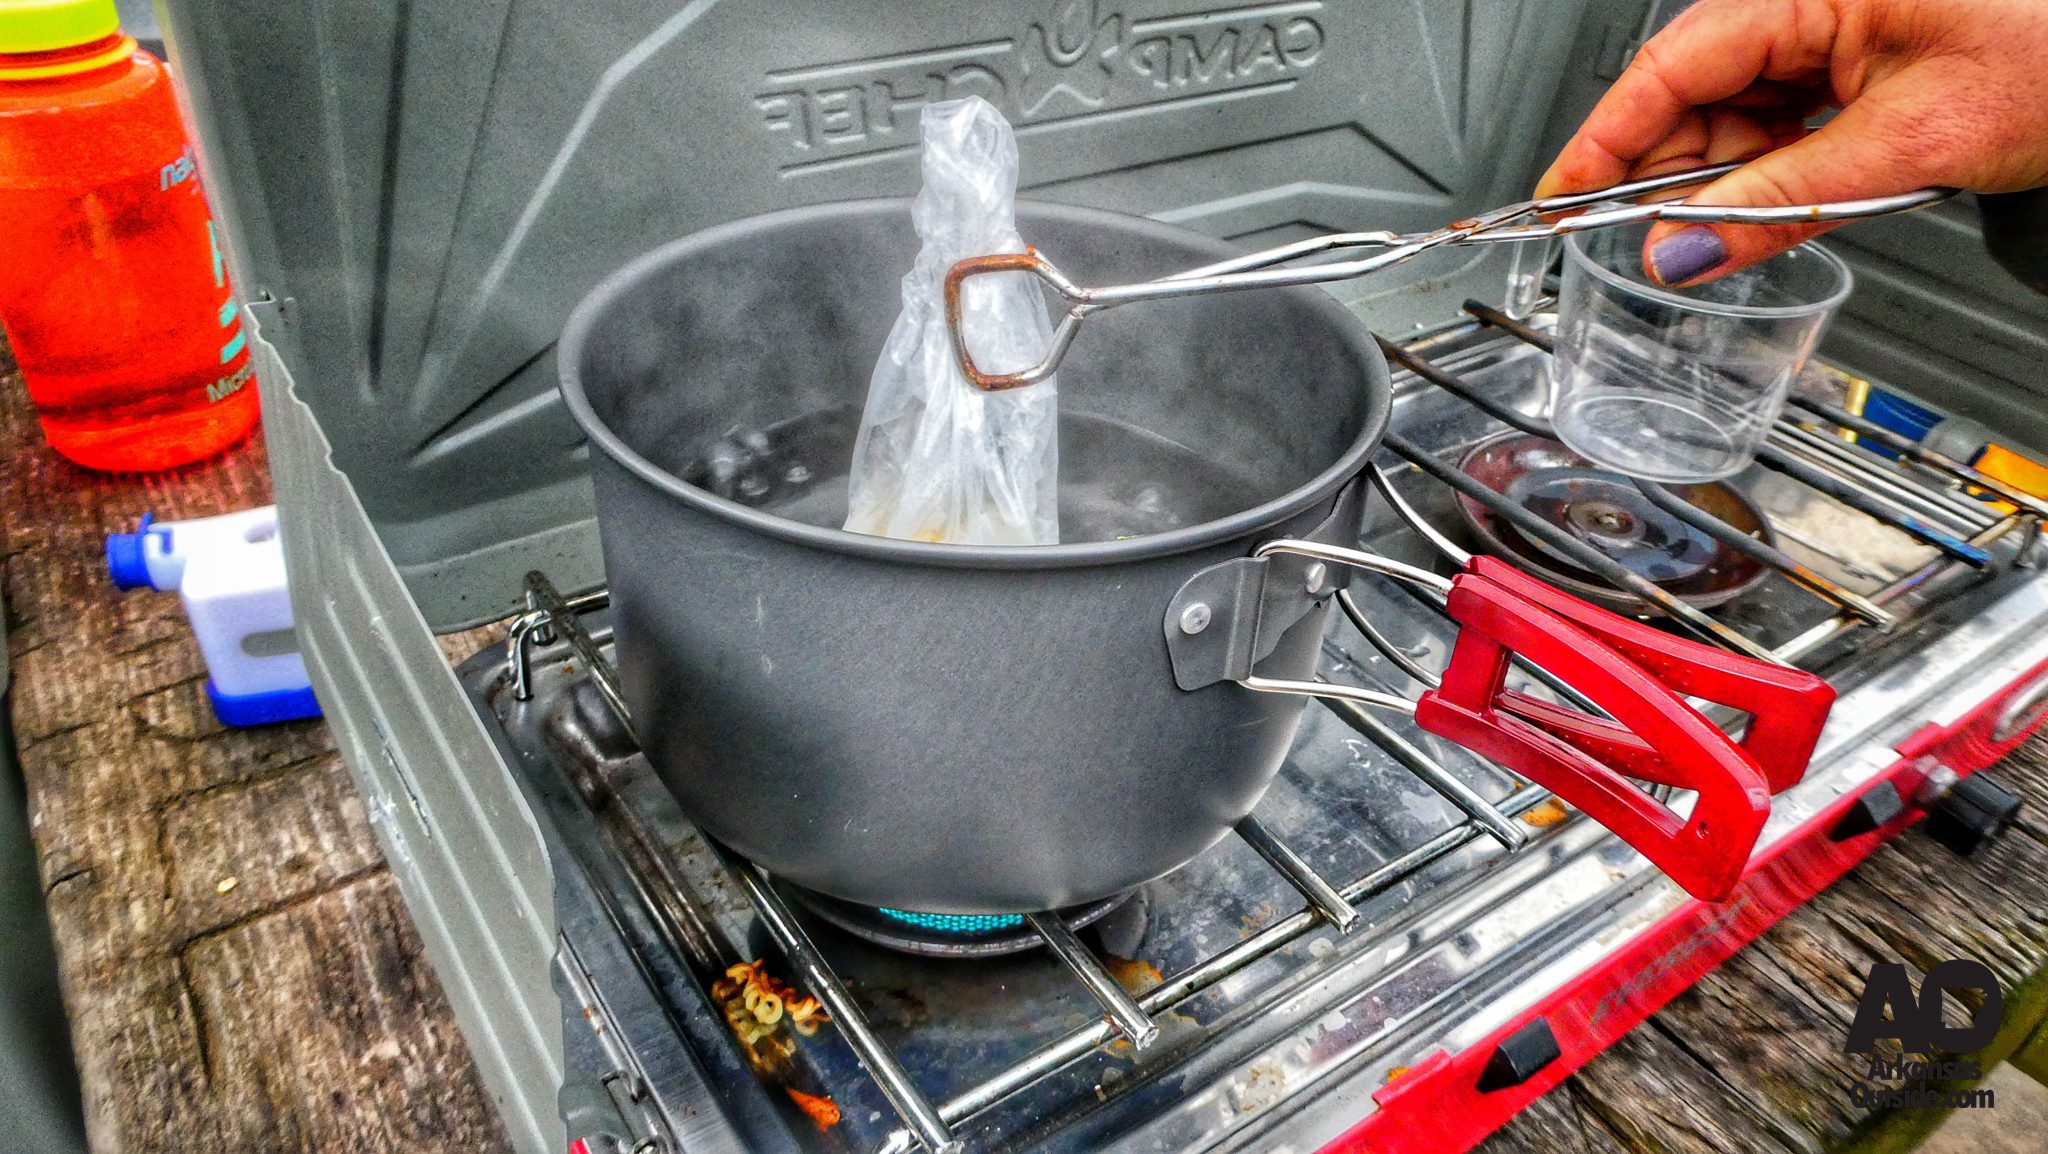
While the water is boiling, use your tongs to hold the bag with your egg(s)in it, in the water. Make certain that you don’t let the plastic bag touch the sides or bottom of the pot. Hold the bag in the boiling water for a couple of minutes, longer if you don’t like your egg yolk runny. If you don’t want to hold the egg, you can put the boiling water in a smaller heat safe cup or bowl and place the bag there. If you like your eggs cooked medium or hard-this may take extra time or require changing the water out if it cools.
Step Four:
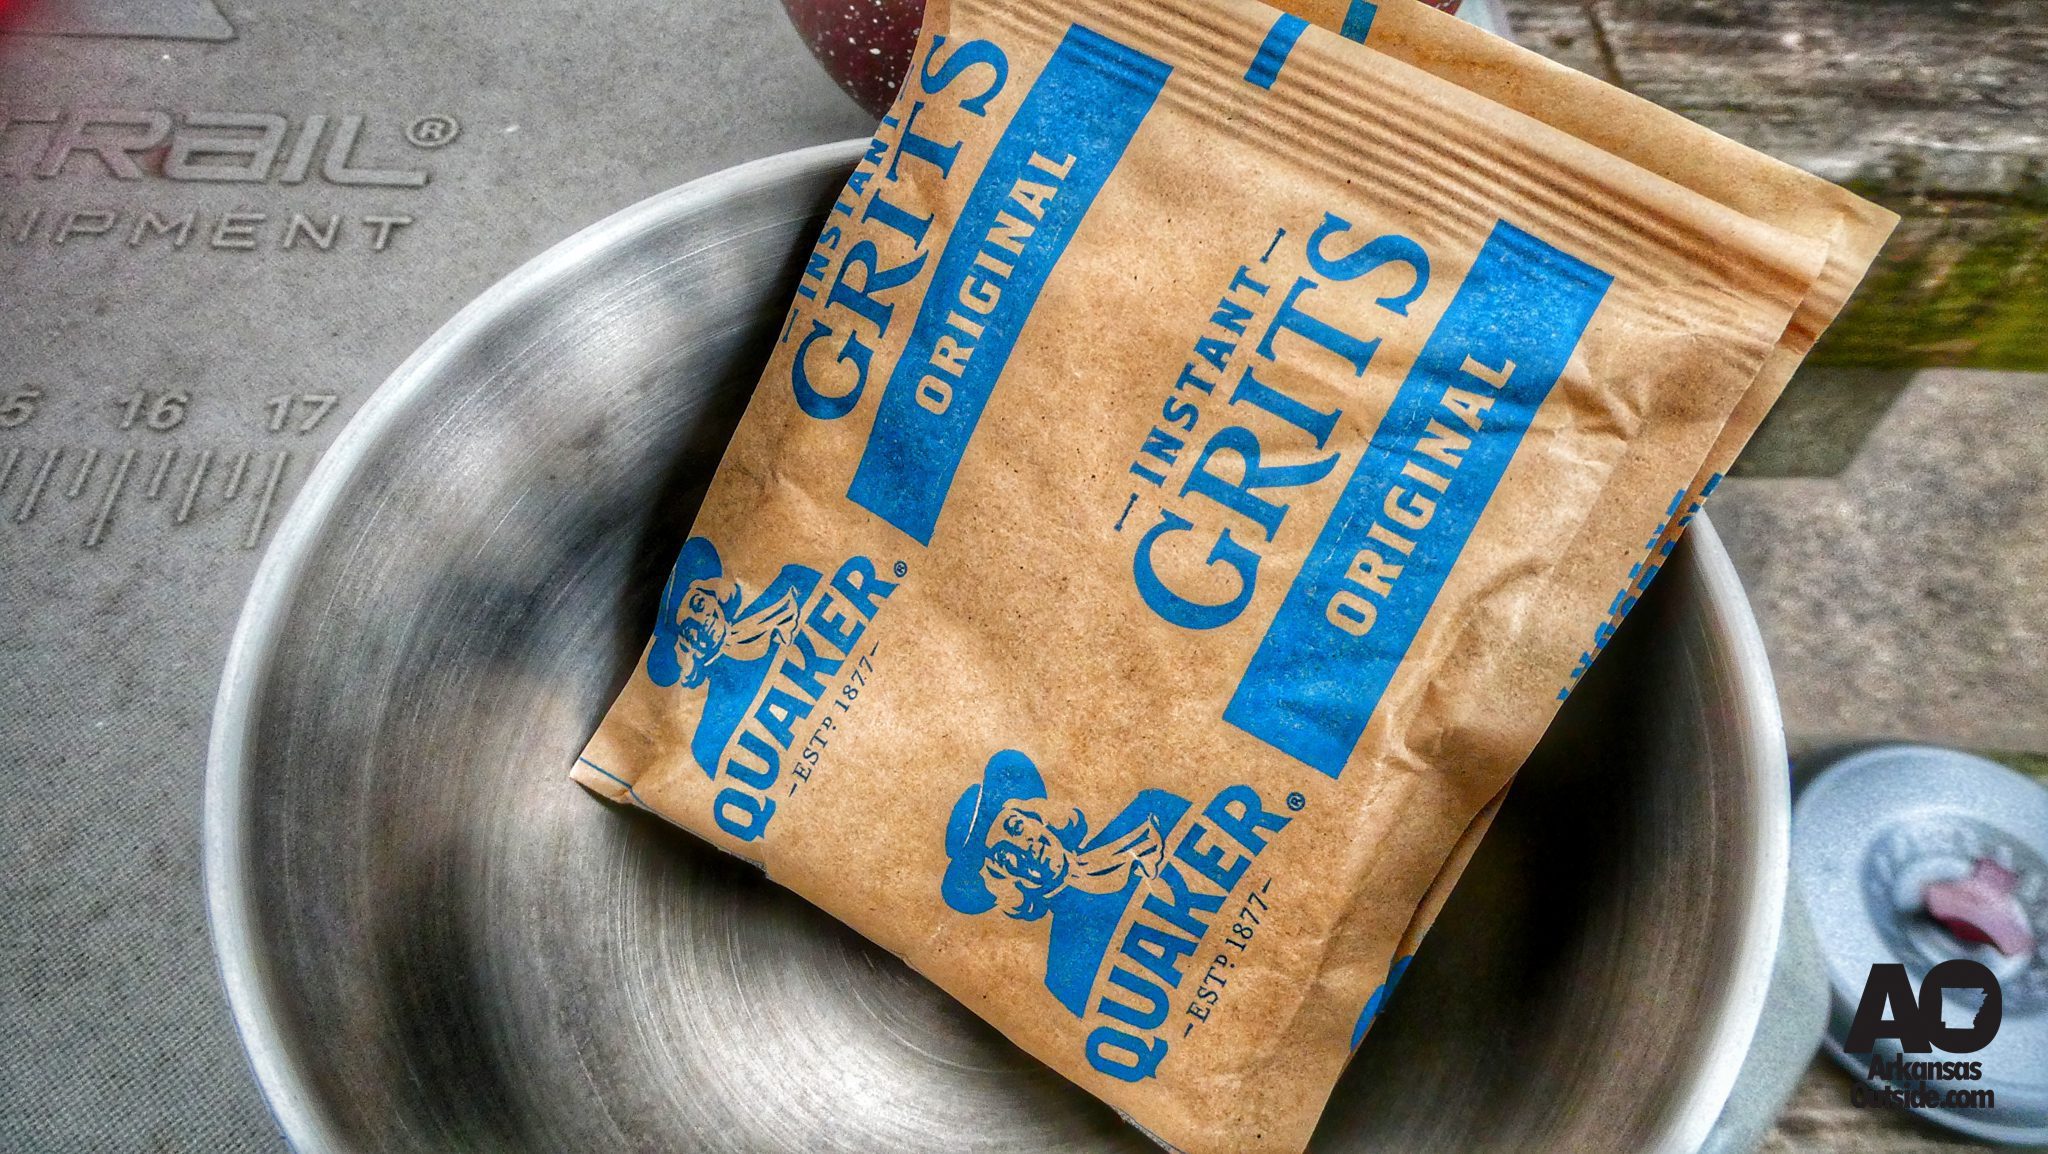
Prepare your grits. Add the appropriate amount of water to the grits to achieve the desired consistency. The grits will generally be set up in a minute or two.
Step Five:

Drop your cooked egg(s) into the prepared grits. Use your spoon to chop the egg up in the grits.
Step Six:
Season with salt, pepper, butter, bacon bits, tabasco, etc. Your choice.
Remember, take your time eating. Enjoy your surroundings. Enjoy the morning campfire. Take a walk with your bowl of goodness down to the creek and just watch the water roll by. This is your moment, soak it in.
We recommend cleaning out your bowl and spoon before leaving on the day’s adventure. It’s simple and can usually be done with a little water and a paper towel if you do it quickly. If you wait, there will be scrubbing and soap involved.

Feel free to share and use these #hashtags: #AROutside #AORefuel #ThisIsMyArkansas #outdoorcooking #camping #grits #eggs #CampChef #KingCamp #FiftyFiftyBottles #Ecovessel
For more ReFuel articles, go here.